ionic.zone - a site about all things Ionic
-
First published: August 2017
Initialize Fastlane for your (Cordova) iOS and Android apps
Now that fastlane is installed you can initialize it into your Ionic project:
Initialize with fastlane init
Initialization of the actual Fastlane installation in your project happens by running fastlane init on the command line. Be aware that this will trigger some errors as we are doing this in a non-standard way. We will start with iOS:
iOS
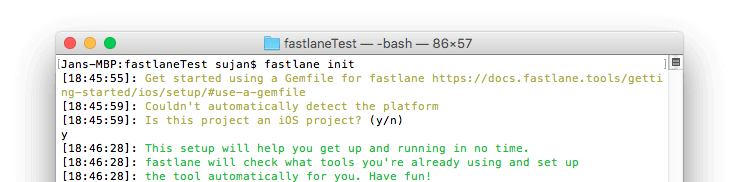
Run fastlane init in your project folder (where your config.xml and /platforms directory exist). As we don’t run this in a default iOS project as Fastlane expects, it can’t automatically detect the platform and will ask you if this is actually an iOS project, which you confirm with y.
It also can’t automatically find the “project file”, so enter platforms/ios/FastlaneIonic.xcodeproj (Replace “FastlaneIonic” with the actual file name that depends on the name you set in your config.xml - best check for the file name in the file system).

Then it asks for your Apple ID that will be used to log in to iTunes Connect and the associated password, which it will store in your system’s keychain via fastlane’s credential manager. (Entering this will (of course) trigger your two-factor-authentication that you also have to enter on the command line)
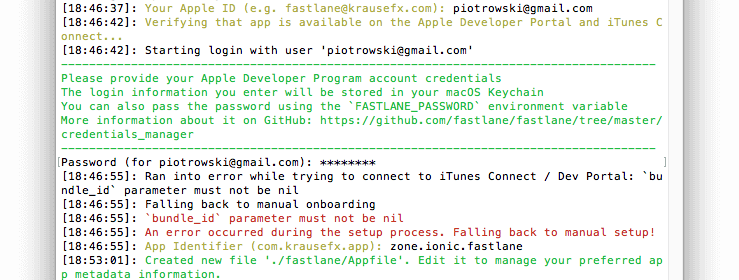
Because of an incompatibility of Fastlane with Cordova iOS projects it currently can’t automatically get your app identifier (called bundle_id in iOS land) and you have to input it manually: zone.ionic.fastlane for this example.
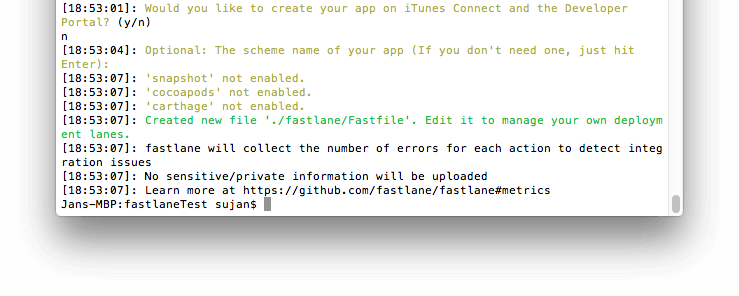
If the login is successful it will ask if you would “like to create your app on iTunes Connect and the Developer Portal?”. For now decline this with n (as we will do this later when we Create the app remotely). The optional scheme input can be skipped by hitting Enter - and that’s it.
If you check your project’s Git working copy it now includes the following files and folders:
fastlane/
├── Appfile
├── Fastfile
└── actions/
Fastfile is a generic (iOS only) example of possible lanes, but Appfile already contains your actual app information:
app_identifier "zone.ionic.fastlane" # The bundle identifier of your app
apple_id "[email protected]" # Your Apple email address

team_id "4Z338HBBX3" # Developer Portal Team ID
On to Android do the same for Android:
Android
As the file structure for Fastlane was already created, and fastlane wasn’t made for projects with both Android and iOS, we unfortunately can’t just run init again and choose n on the iOS? question to trigger the generation of the Android data.
But lucky for us the Android process only creates minimal content on both Fastfile and Appfile which we can replicate manually with little effort.
Add Android to Fastfile and Appfile
First you add an empty json_key_file entry and package_name entry with the same value as app_identifier to the bottom of the Appfile:
[...]
json_key_file "" # Path to the json secret file - Follow https://docs.fastlane.tools/actions/supply/#setup to get one
package_name "zone.ionic.fastlane" # e.g. com.krausefx.app
The file listed as json_key_file will contain similar information to your apple_id and team_id (and username and password) for accessing an API and be defined later in the process.
Add an additional set of default android lanes at the end of the Fastfile:
[...]

platform :android do
  before_all do
    # ENV["SLACK_URL"] = "https://hooks.slack.com/services/..."
  end

  desc "Runs all the tests"
  lane :test do
    gradle(task: "test")
  end

  desc "Submit a new Beta Build to Crashlytics Beta"
  lane :beta do
    gradle(task: "assembleRelease")
    crashlytics

    # sh "your_script.sh"
    # You can also use other beta testing services here
  end

  desc "Deploy a new version to the Google Play"
  lane :deploy do
    gradle(task: "assembleRelease")
    supply
  end

  # You can define as many lanes as you want

  after_all do |lane|
    # This block is called, only if the executed lane was successful

    # slack(
    #   message: "Successfully deployed new App Update."
    # )
  end

  error do |lane, exception|
    # slack(
    #   message: exception.message,
    #   success: false
    # )
  end
end
Setup authentication
First step is to setup authentication. There is no simple email + password login mechanism for the Google Play Console API, so you will have to follow these quite elaborate instructions to get a google_play_key.json file.
Move your google_play_key.json file to the same folder your whole Ionic project is in (note that it is not under version control there!) and edit your Appfile:
json_key_file "../google_play_key.json"
Test authentication
Now you can run fastlane supply init --verbose to test if this setup actually works:
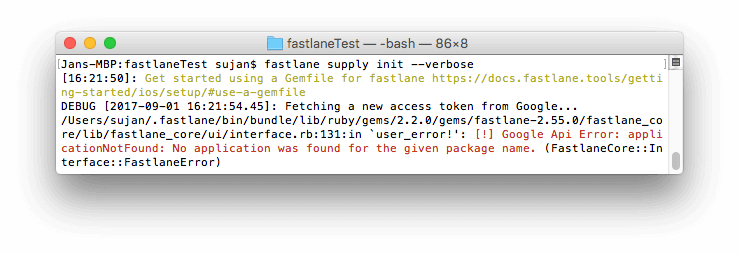
You want to see Fetching a new access token from Google... and then a error Google Api Error: applicationNotFound: No application was found for the given package name. This means the API authentication was successful (and it failed because of other things, that we will fix in the next steps).
Current State
Now we have a fastlane folder with an Appfile that contains information about both our apps and a Fastfile with some example lanes for both platforms. You also have an empty actions folder for filling later and your Apple ID password is saved in your keychain for later usage.
On to create your apps on the stores.
-
First published: August 2017