ionic.zone - a site about all things Ionic
-
First published: March 2018
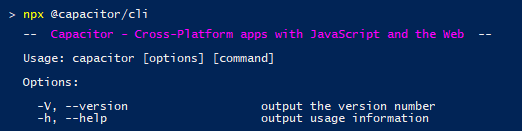
Overview of the Capacitor CLI, @capacitor/cli
Most of the interactions you will have with Capacitor will be through its Command Line Interface or CLI: npx cap (or npx capacitor).
This article describes how it works and lists all its commands and explains what they do:
- npx?
- 1. Create a Capacitor project
- 2. Add native platforms
- 3. Develop your app
- 4. Update your native Capacitor project(s)
- 5. Helpers
npx?
The cap in npx cap obviously stands for “Capacitor” and is an alias for npx capacitor, which would have been a bit too long to type in regularly.
But did you notice the npx in front of it? npx is a relatively new “package runner” from the team behind npm that allows you to run npm packages as CLI tools without globally installing them.
If you used Cordova or Ionic before, you know that the first step before being able to create a project with them is always to create a global installation of their CLI tool by running npm install -g cordova or npm i -g ionic. Then cordova or ionic becomes available globally in your command line.
npx on the other hand enables you to a) run a local package from the project you are working on or b) run a package that is not (yet) installed in your project or even outside of a project context alltogether.
Besides being pretty handy, this also means that each Capacitor project can have its own version of the CLI locally installed in the project. Even if you upgrade one Capacitor project, you can easily still use an older version in another project.
The first two Capacitor commands use these options:
1. Create a Capacitor project
To create your Capacitor project you have two options:
a) npx cap init [appName] [appId]
If you already have a web app with a package.json file, for example one built with Ionic, you start by installing the CLI and the Core library locally with npm:
npm install @capacitor/cli @capacitor/core
Then you can use the init command from above to initialize a Capacitor configuration file, capacitor.config.json, in your existing project.
b) npx @capacitor/cli create [appDir] [appName] [appId]
If you start without an existing web app project, you can use npx to temporarily download and install @capacitor/cli and use its create command to generate a whole Capacitor project with a rudimentary web app included (that has @capacitor/core installed).
2. Add native platforms
To actually start development of a native app you now have to add the platforms you want to support in your app to the project:
npx cap add [platform]
Running npx cap add ios and npx cap add android will create an ios and android folder that contain ordinary native platform projects - with the native Capacitor libraries already installed.
It also runs sync - details on that see below - to setup the native project.
3. Develop your app
There is not really a CLI command for that - you still have to do that manually 😄
But there are 2 commands that might make it easier for you:
npx cap open [platform]
Opens the project in the native IDE for the chosen platform:
- Xcode for iOS
- Android Studio for Android.
You can of course also open in manually, but open will use the correct path by default and save you a few seconds.
npx cap serve
If your web app doesn’t have its own serve or watch workflow, Capacitor provides a minimal implementation that serves the current content of www to your default browser.
4. Update your native Capacitor project(s)
Now that you have your native projects (via npx cap add) there are two tasks that you have to use frequently and from time to time respectively:
npx cap copy [platform]
Each time you create a new build of your web app in www, it has to be copied over to the native platforms to be included in the next native build of the app. copy takes care of that.
If you run your build via e.g. npm run build, it probably makes to add the npx cap copy command to the end automatically. For an Ionic project this might look like this:
# package.json
{
  "scripts": {
    "build": "ionic-app-scripts build && npx cap copy",
  },
}
npx cap update [platform]
If you also installed, updated or changed any native plugins (Capacitor or Cordova) via npm/package.json or updated Capacitor itself, you will have to use update to also apply those changes to the native projects. (Capacitor itself calls this “Periodic Maintenance”).
The process copies over the plugin JS files and “installs” them into the native projects so they will automatically be picked up the next time the native app is built.
Beware: For iOS this process might take quite long as it does a lot of things with Cocoapods for the plugins, which is also why this is a separate command from copy.
npx cap sync [platform]
This convenience command combines copy and update from above. Use it if you want to make sure all changes are synced to the native projects.
5. Helpers
There are also 2 more commands that might come in handy during development:
npx cap doctor [platform]
This command checks the current project and setup for common errors.
npx cap plugin:generate
Create a new Capacitor plugin from a minimal template.
And that’s it!
As Capacitor doesn’t abstract building and packaging your apps (read more about the differences between Cordova and Capacitor), these are all the commands that exist and are needed.
-
First published: March 2018